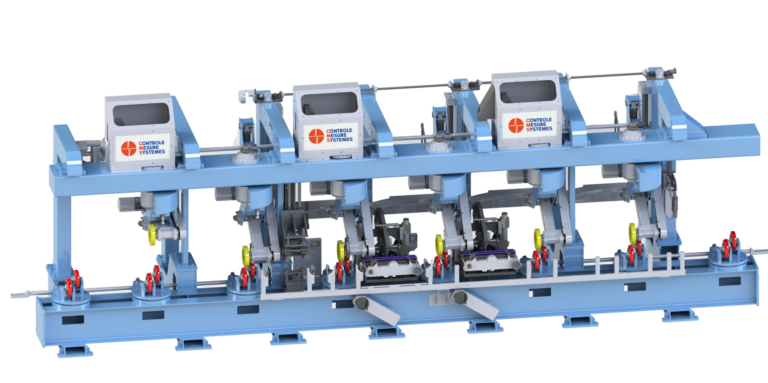
Ultrasonic Testing of Large-Diameter Tubes and Bars
Two methods can perform full body inspections of seamless and ERW tubes, or bars:
- Ultrasonic inspection with a moving testing bridge
- Ultrasonic inspection with a moving tube (rotation and translation)
Our system can detect longitudinal, transverse, oblique and lamination defects, as well as dimensional and thickness measurements.
Phased Array Ultrasonic testing is used to ensure great control accuracy and high productivity.
Eddy Current testing with Array Probe can be added for surface defect detection.
The Ultrasonic instrument associated with this application is the MultiUTscan, available in a rack-mountable version for easier integration into control cabinets.
These systems meet the requirements of current European and international standards (ASTM, API, DIN, SEP, BS, ISO, ASME, ASNT…), calibration standards and comply with NF EN ISO 22232-1.
MAIN ADVANTAGES
- Inspection of large diameter tubes and bars (from 210 to 650 mm – up to 8.2 to 25.6″)
- No uncontrolled areas at the beginning or end of the tube
- Depending on the tube thickness, we can work with a water column or a water film
- Marking of the defects
- Possibility to automatically go back to the defect location
- Creation of thorough inspection reports, with C-scan
- High-performance CMS software
- OPERATING PRINCIPLE
Ultrasonic tube inspection using a gantry inspection
The tube is conveyed and stopped on the roller track under the inspection gantry. It is then rotated, and the upper gantry places the inspection elements on it.
The inspection elements are all independent, with their own compliance systems for optimum tracking of the tube/bar to be inspected.
The inspection carriage then travels over the surface of the tube, inspecting it with a helical pitch.
Roto-translation Ultrasonic inspection using a test bench
The tube is conveyed by the conveyor mechanism, then roto-translated by the bench and its pinch-rolls.
As the tube progresses through the middle of the bench, a number of control elements come into contact underneath to inspect it.
The various Phased Array transducers are placed inside these inspection tanks, which have their own degrees of freedom, guaranteeing perfect tracking of the tube and precise management of uncontrolled zones.

