Mapping
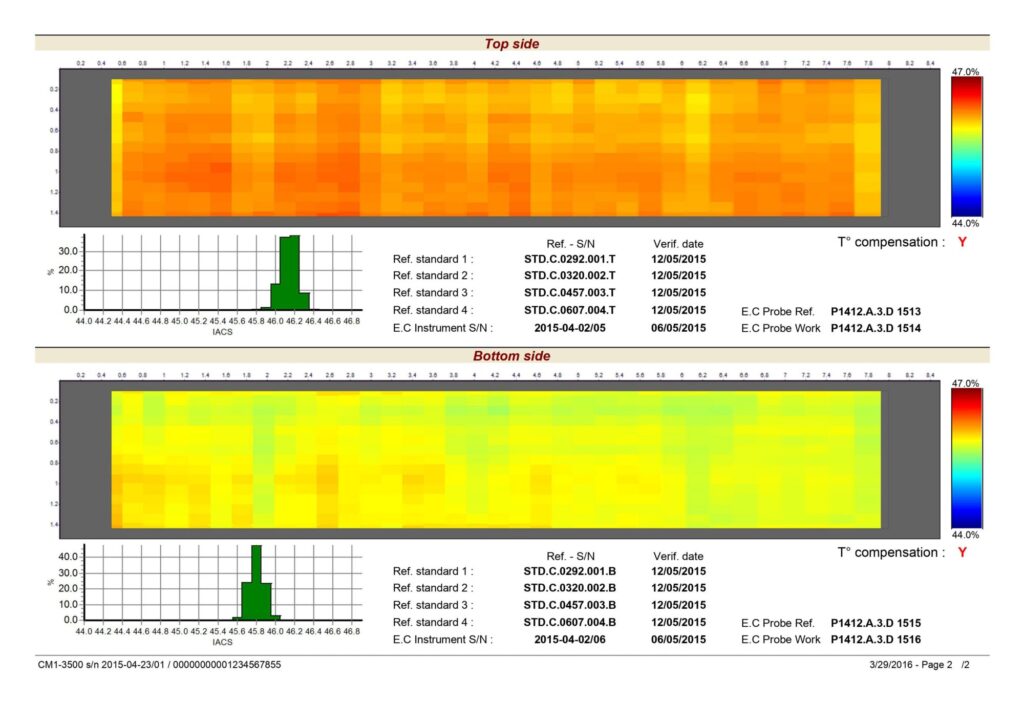
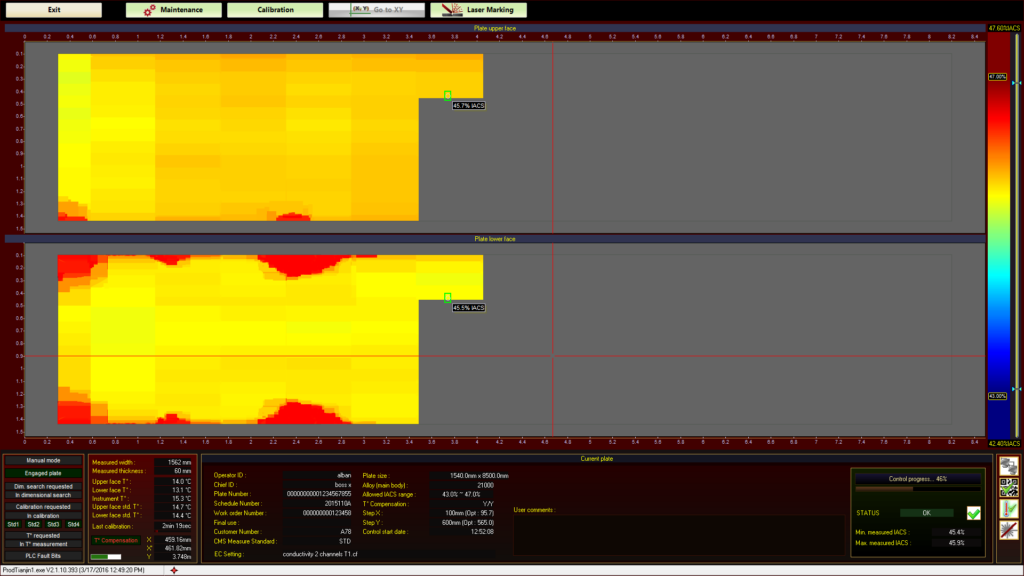
The software centralizes and collects information from the NDT equipment and produces a color map of the inspected product.
The color variation is representative of the presence and importance of defects, defect size or conductivity measurement value dispersion.
The mapping is used to detect and position surface defects when connected to an Eddy Current system, or to perform B-Scan and C-Scan when connected to an Ultrasonic system.
These reports can be presented as proof of inspection by quality departments and customers.
It can be integrated into all instruments in the Zet@ range and into the optional MultiUTscan.
MAIN ADVANTAGES
- Possibility to connect with an Eddy Current system for detection and positioning of surface defects or of an Ultrasonic systemfor the production of B-Scan and C-Scan
- Exact location and amplitude value of each indicator on the cartography
- High resolution of measurements
- Connection with encoders
- Network connection for remote assistance
- Meets the requirements of international standards


